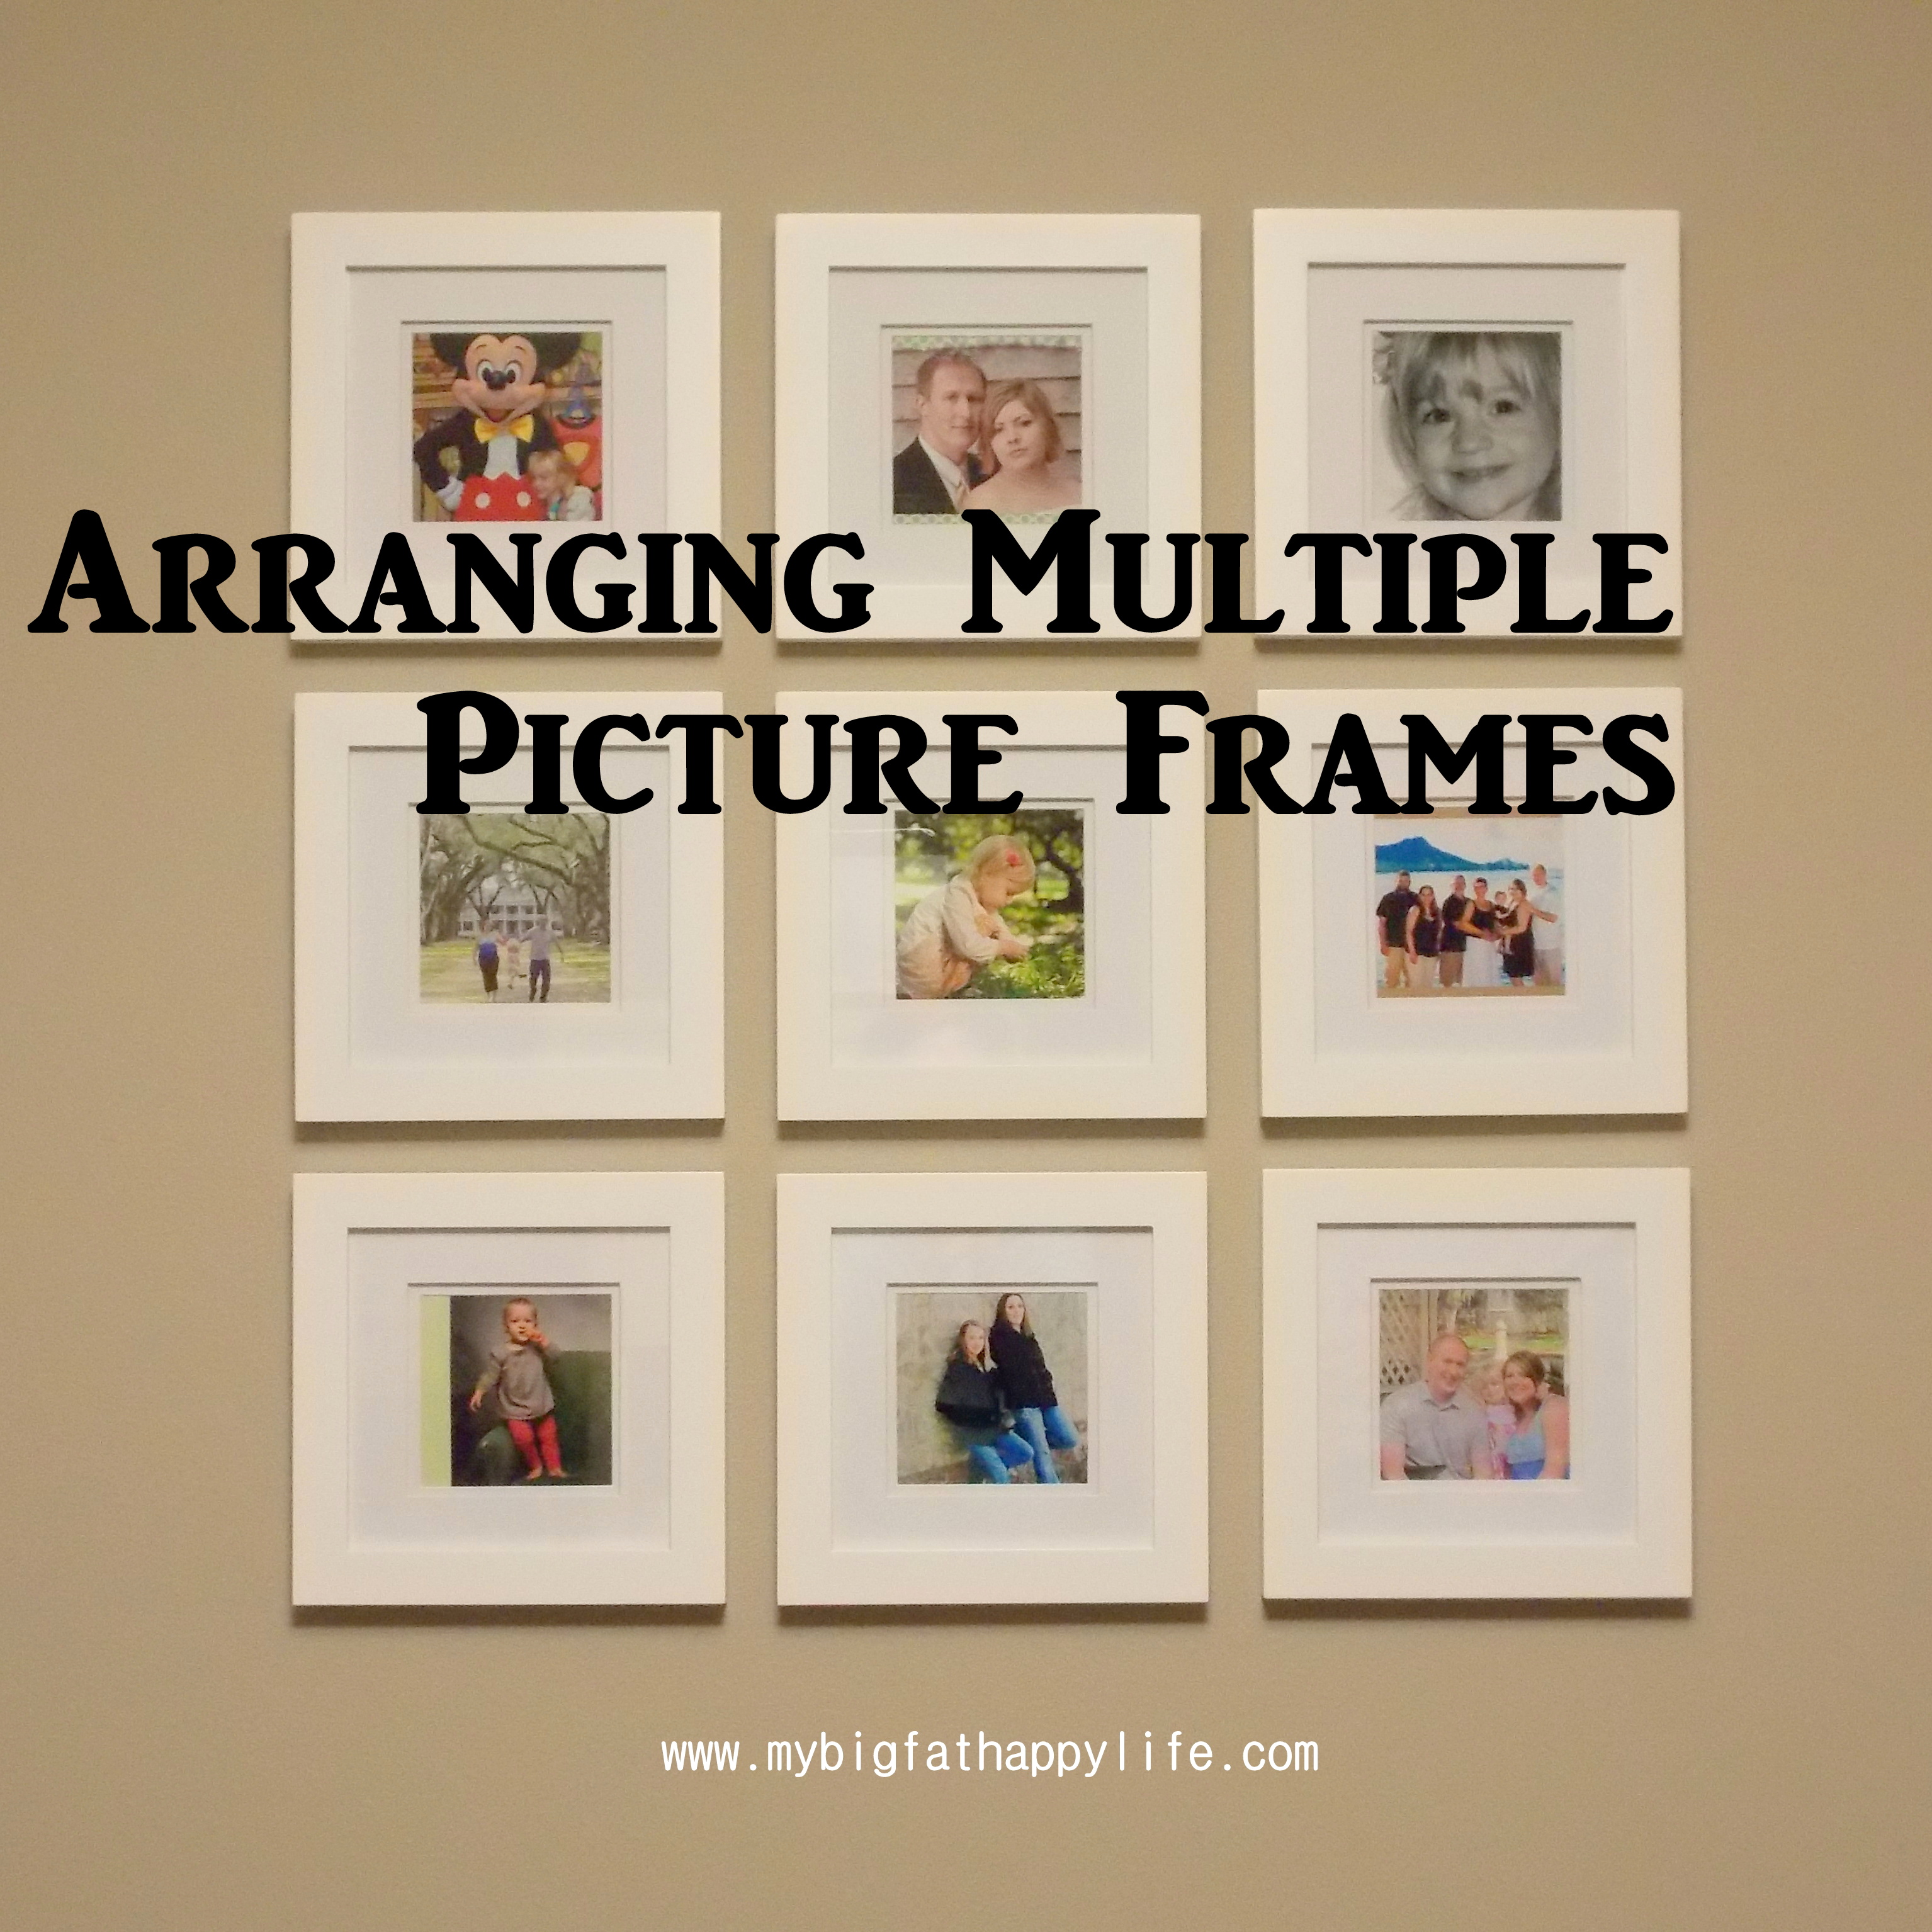
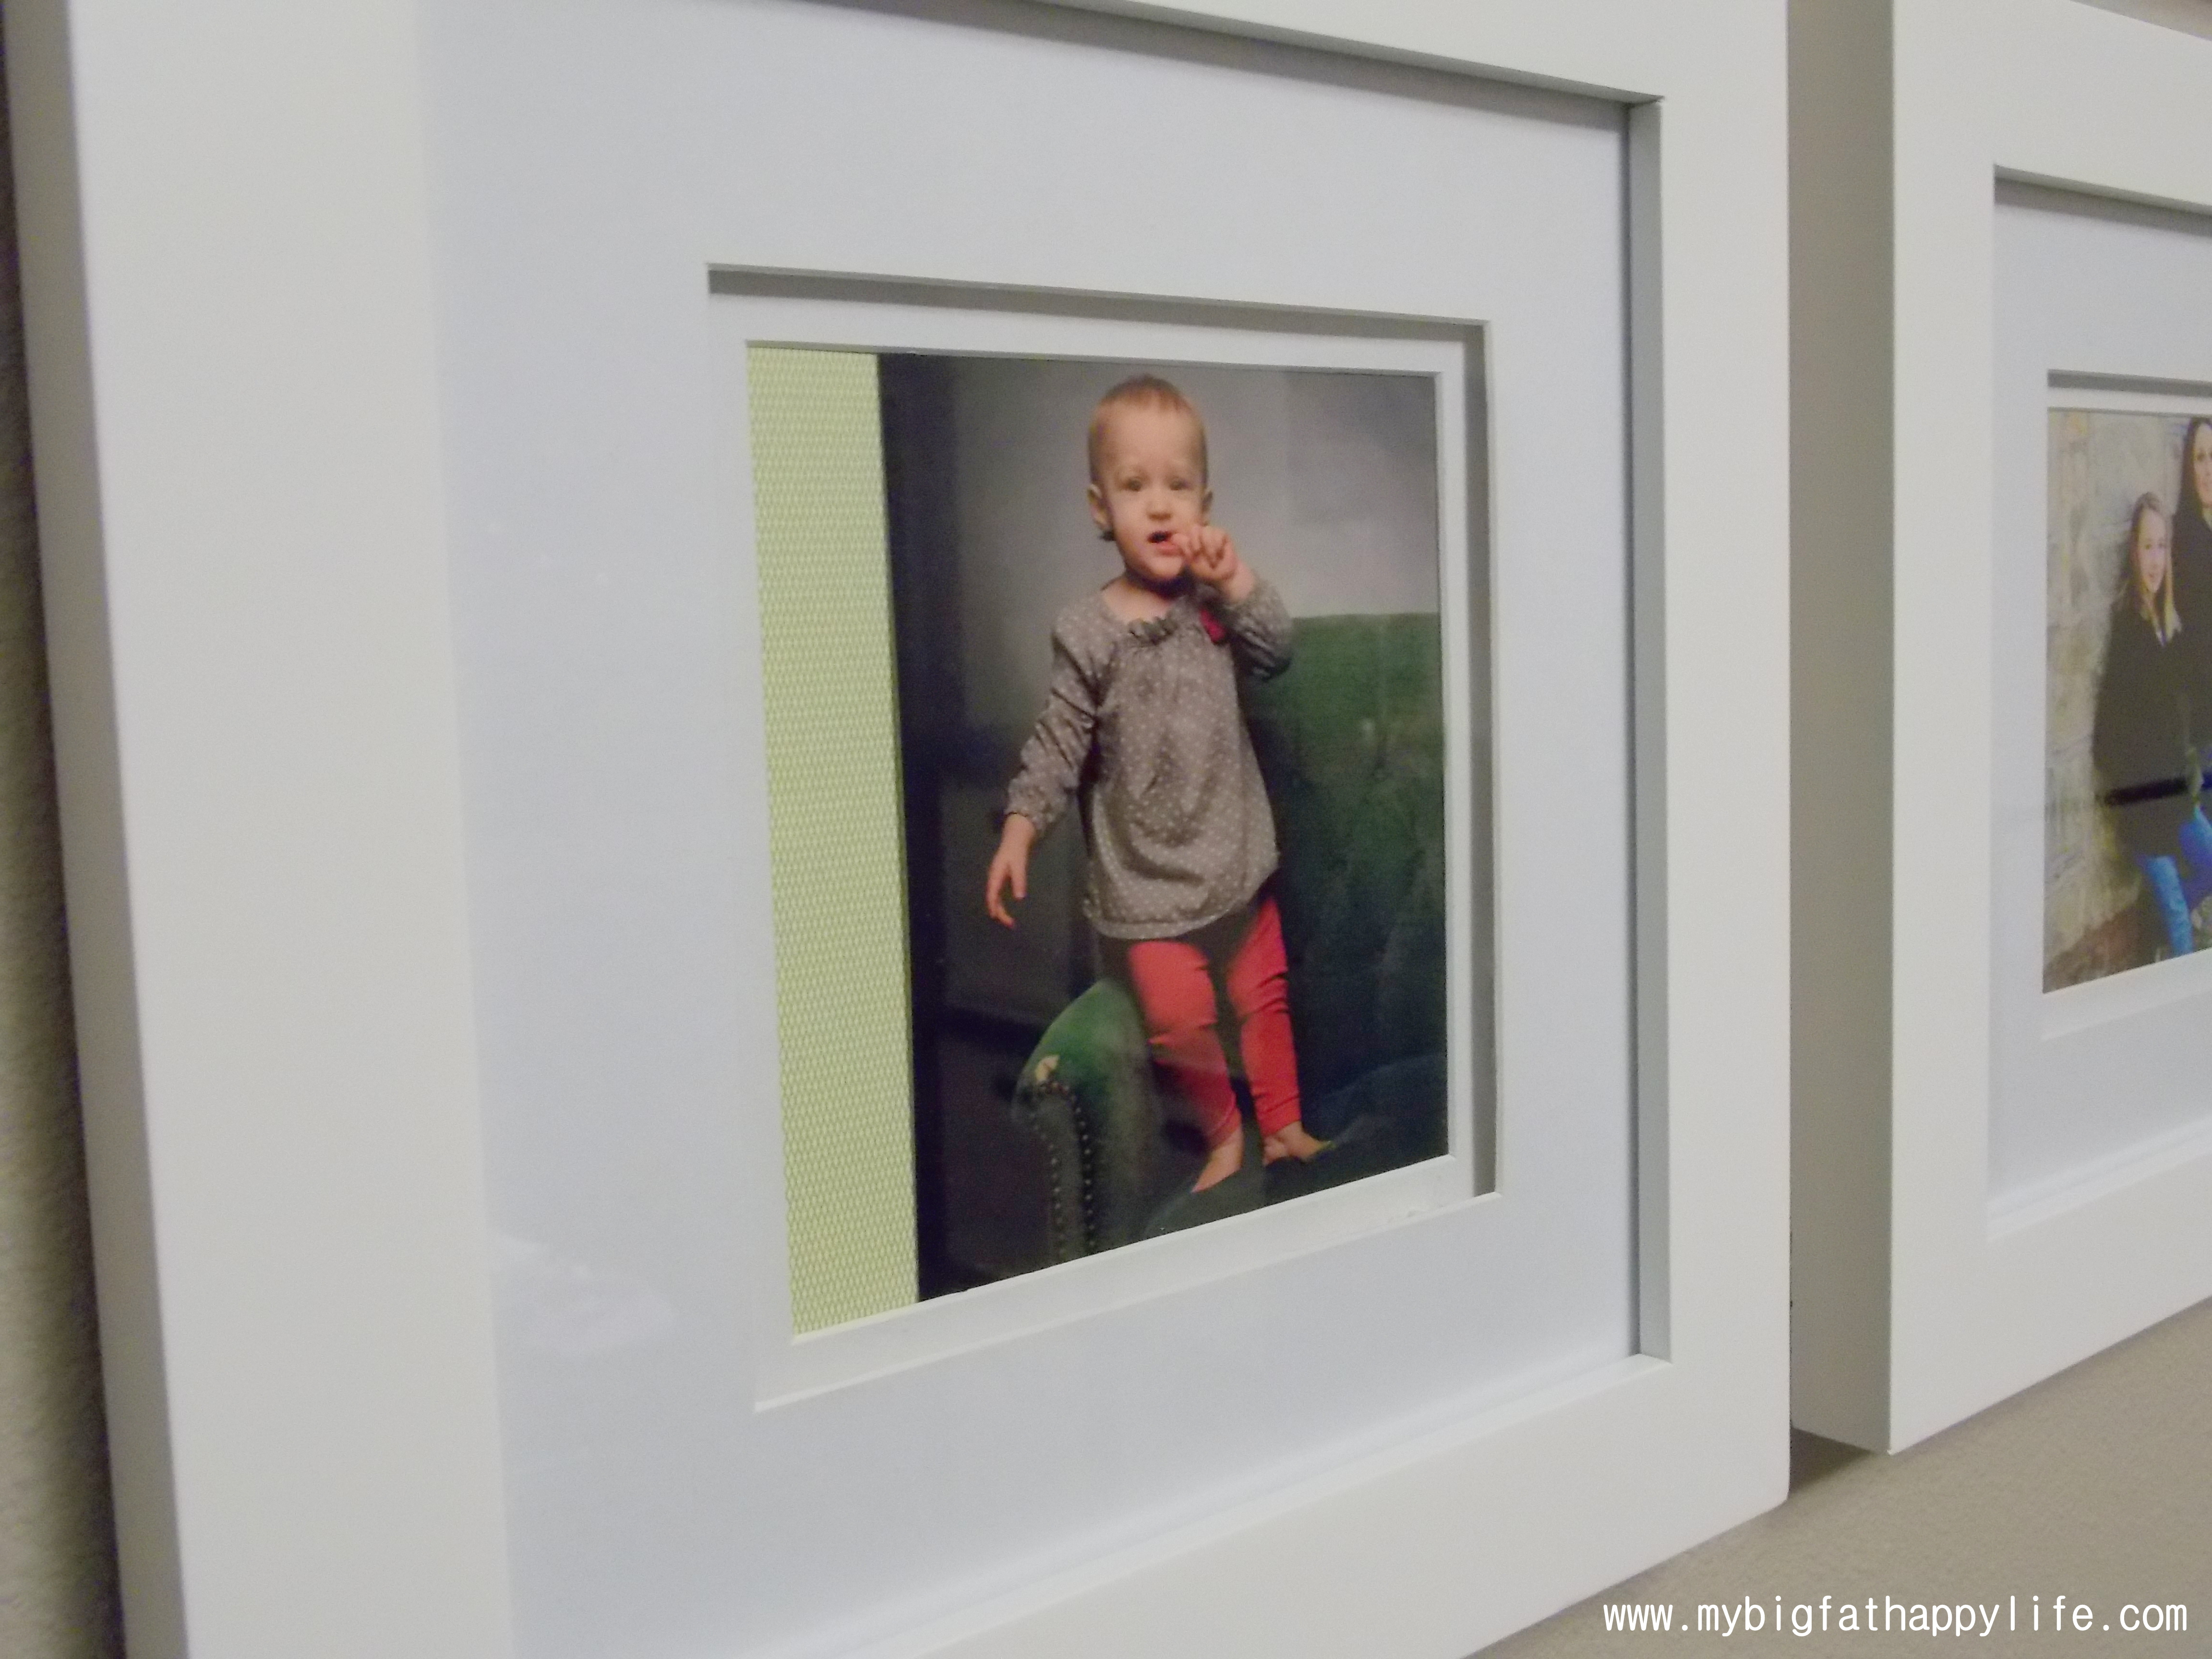
I had a vision in my mind of creating a grid of photos on a blank wall in my office. I purchased 9 square white picture frame at Michaels when they were on sale during Thanksgiving. The photo openings were 5 inches by 5 inches. While I had quite a few 5×7 photos that would work , I also had some 4×6 photos that I wanted to use. I ended up attaching my 4×6 photos to scrapbook paper using washi tape, so that a small edge of the scrapbook paper showed.
I added all my photos to the frames first and then laid them out on a table the way that I want them to appear on the wall.
I am addicted to the Command Picture Hanging Strips. Every picture in my house is hung using these Command strips. I love that they are forgiving, so that if I do not get the picture completely straight the first time I can re-position it using the Velcro connection. Also, because there are two or more strips on each picture frame the frame does not move on the wall versus when I use a nail the picture frame swings crooked half the time. In addition, if I decide to change my mind or want to swap out the picture frame for a bigger size I do not have a hole in my wall that needs to be patched and painted.
Add the Command strips to the back of the picture frames following the directions on the packaging.
To hang the pictures on the wall, I started with the center frame. It is really important that you get this frame straight since you will be building the entire grid off of it. Then I grabbed something that was the width that I wanted the frames apart (I used the battery from my camera) and a level. I placed my battery up against the center frame and placed the level on top and over hanging to the right. Then I bumped my next frame up against the battery and touching the level before I pressed the frame to the wall.
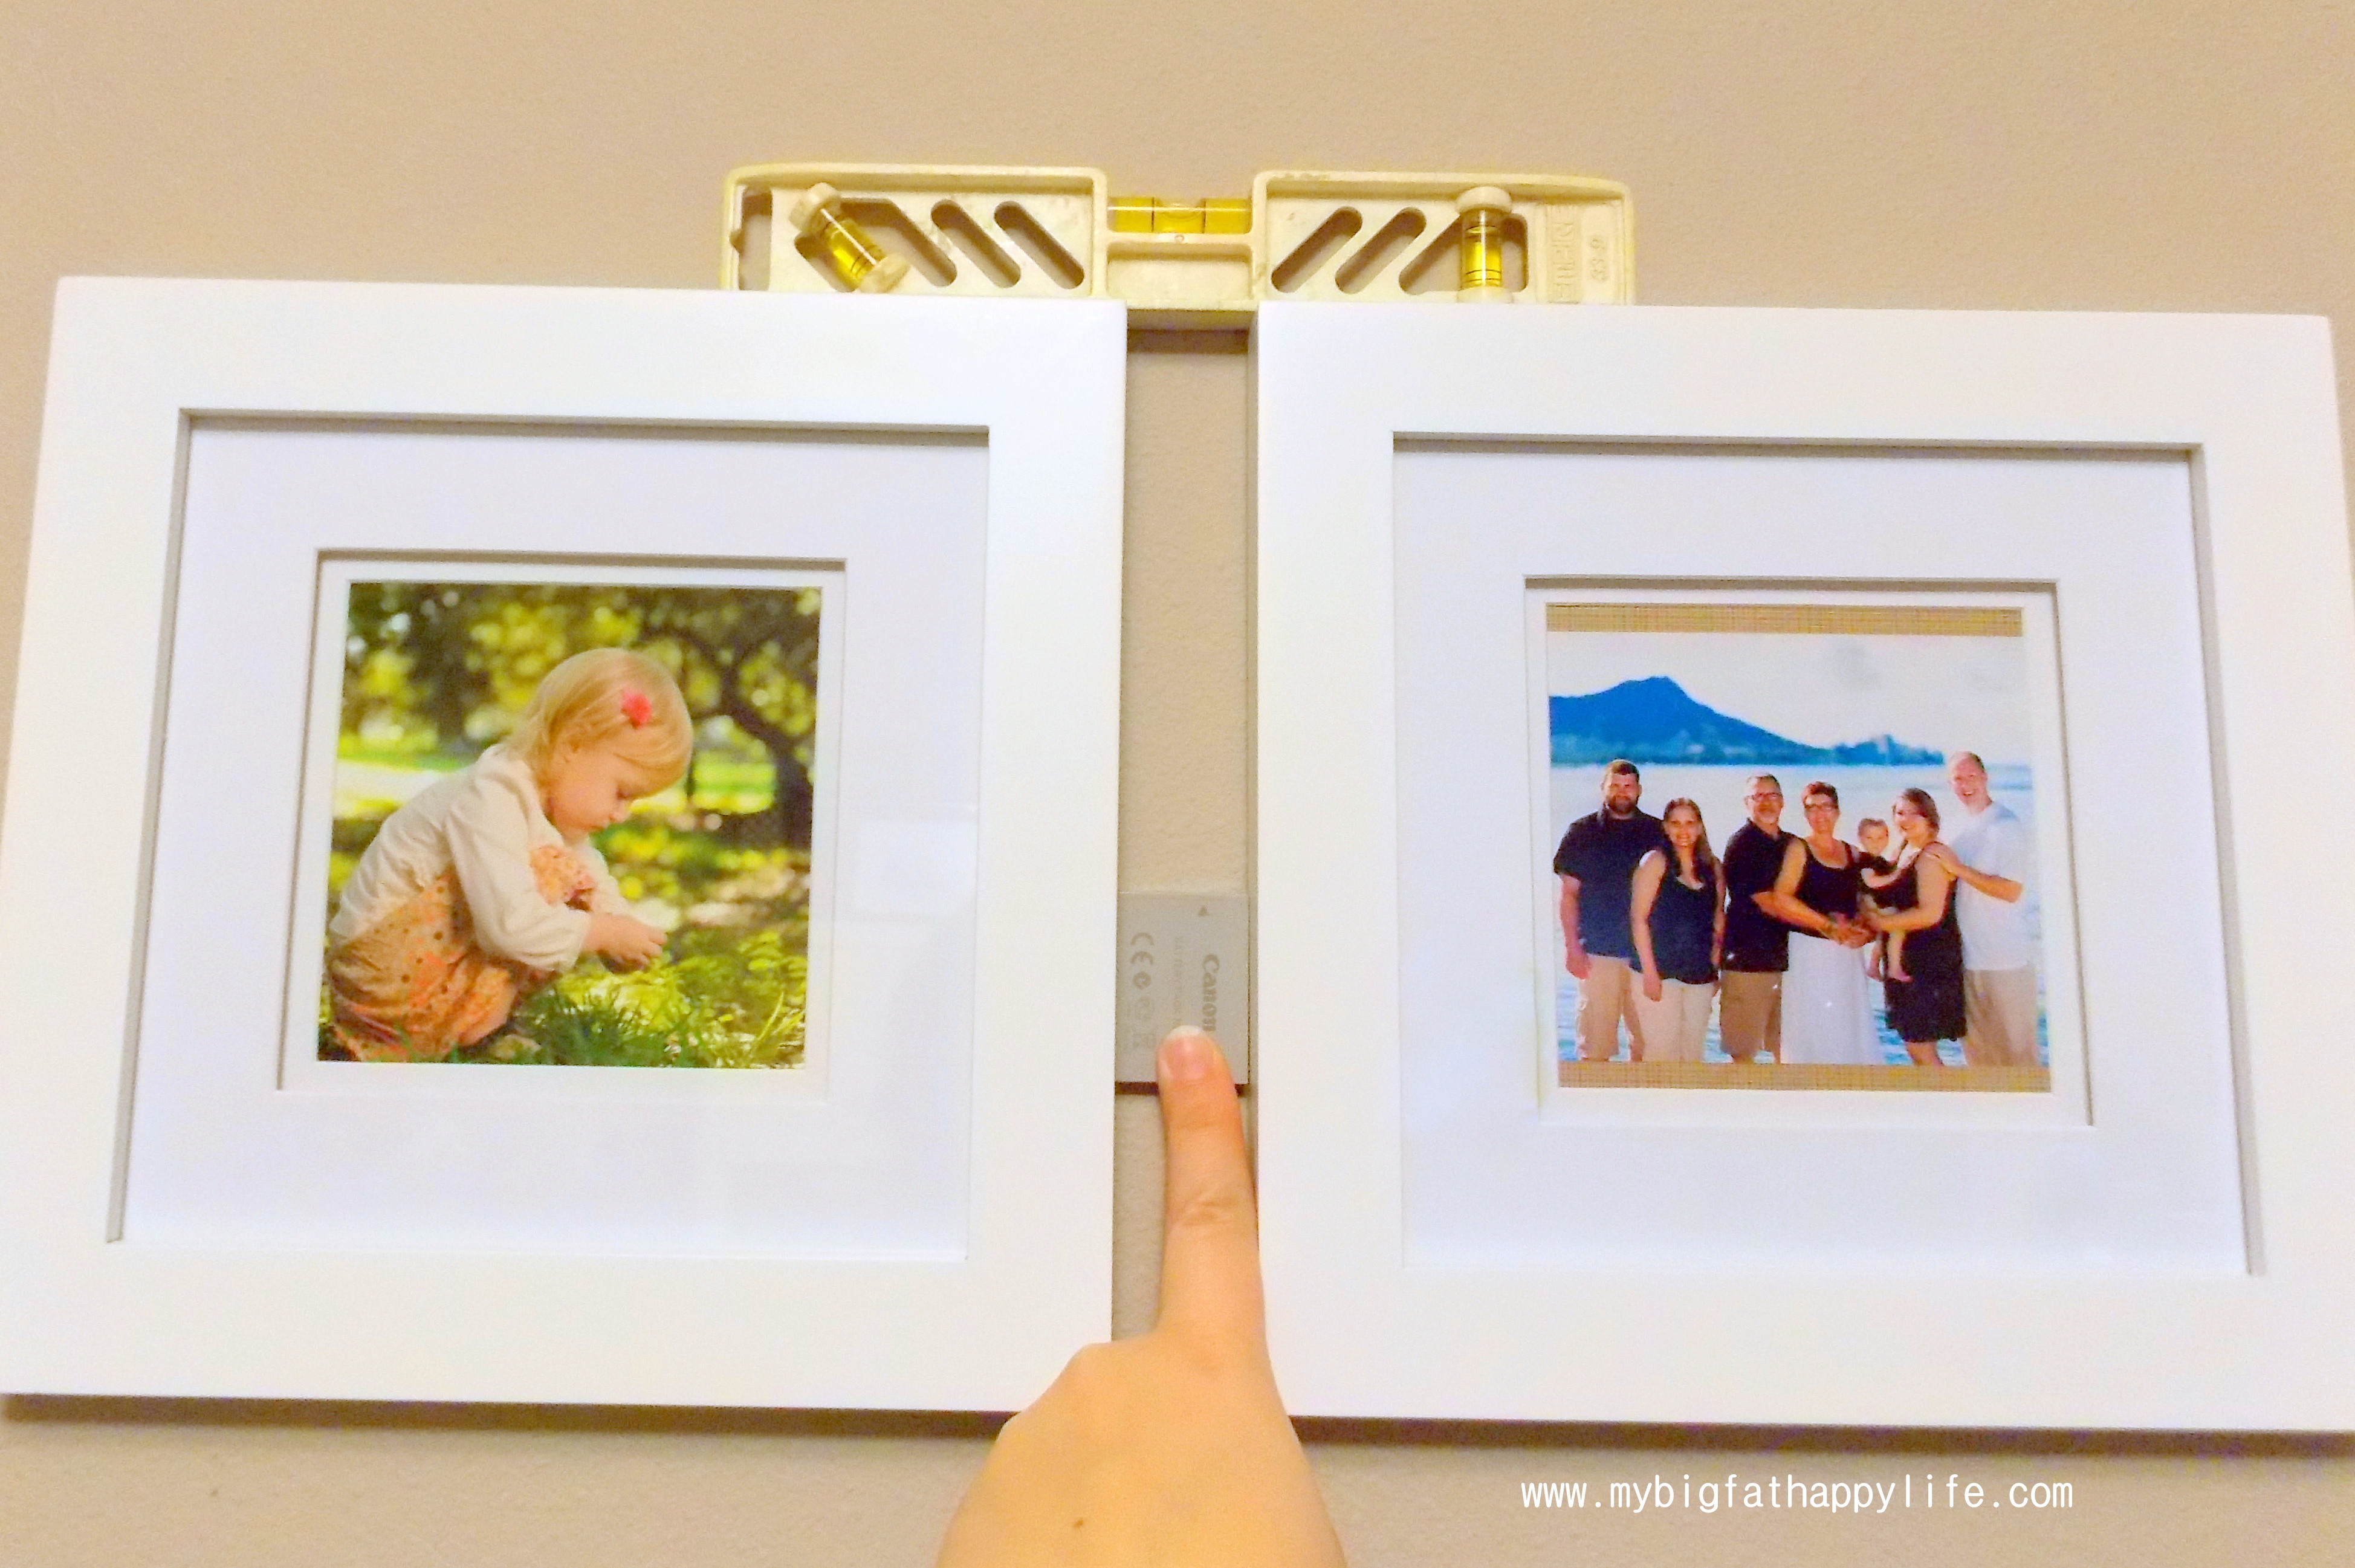
I continued working my way out from the center frame. I added both frames to the right and left of the center, before adding to the top and bottom of the center and then filling in the remaining frames.
The process was actually quite easy and I love the finished wall!


I love and appreciate this as I have been called The Picture Queen before. Thank you for this.
The pictures on the wall have to be straight 🙂 Thank you for visiting Shirley!
that looks really good! straight lines are my downfall 😛
Yes, and I always want pictures to look perfectly straight on a wall
Love it! Your photo grid looks so perfect and straight. I especially love the repurposing of the camera battery 😉
Thank you Alex! The camera battery was the perfect width 🙂
This looks great!
Thank you for stopping by Melissa!
Once we move I want to do something like this. This tutorial will come in handy! 🙂
Thanks Logan!
It came out prefect! I’ve heard of Command Strips I believe on tv. Glad to see that it works!
We have never had any issues with Command Strips!
I always use a level when hanging a grouping of pics! My family laughs at my obsession with everything being perfectly aligned. I love your frames, by the way and you did an excellent job. Pinning!
You are not the only one wanting everything aligned! 🙂
Excellent tips! I am constantly putting sticky notes on the wall so I know where to put the nail haha! Thank you for sharing 🙂
http://neatly-packaged.blogspot.com/
It’s funny how we ended up using what we can find around the house to help us!
I love Command strips– I use them for everything!
I’v e been wanting to work on a gallery wall forever, but I’m loving the look of this grid and it would probably be so much easier. Thanks for the idea and tips!
Thanks Kristin, I hope you display your photos soon!
Awesome! Oh man, I could have used this a couple of weeks ago! My pictures are SO crooked right now, I tried so many times over!
Isn’t that the worst?
Great tip!!! Will have to use this when I am putting up my gallery wall to ensure the pics are evenly spaced.
Your gallery wall is going to be perfect!
This looks great! I want to try 🙂 Found you via SITS Summer of Social Love
I hope you give it a try Tamar, thanks!
Very nice! I have always wanted to do this! Will try it when I get a house with more wall space!
Thank you Nadeen! It was so easy to do!